• Home
  • My Book
  • about leigh
  • Contact
Menu

leigh medeiros

P.O. Box 113
Exeter, RI 02822
Screenwriter . Author . Climate Storyteller

Your Custom Text Here

leigh medeiros

  • Home
  • My Book
  • about leigh
  • Contact

How to Make Sure Your Art Looks Good On the Wall

January 7, 2014 Leigh Medeiros
YES Gallery + Studio, 2009

YES Gallery + Studio, 2009

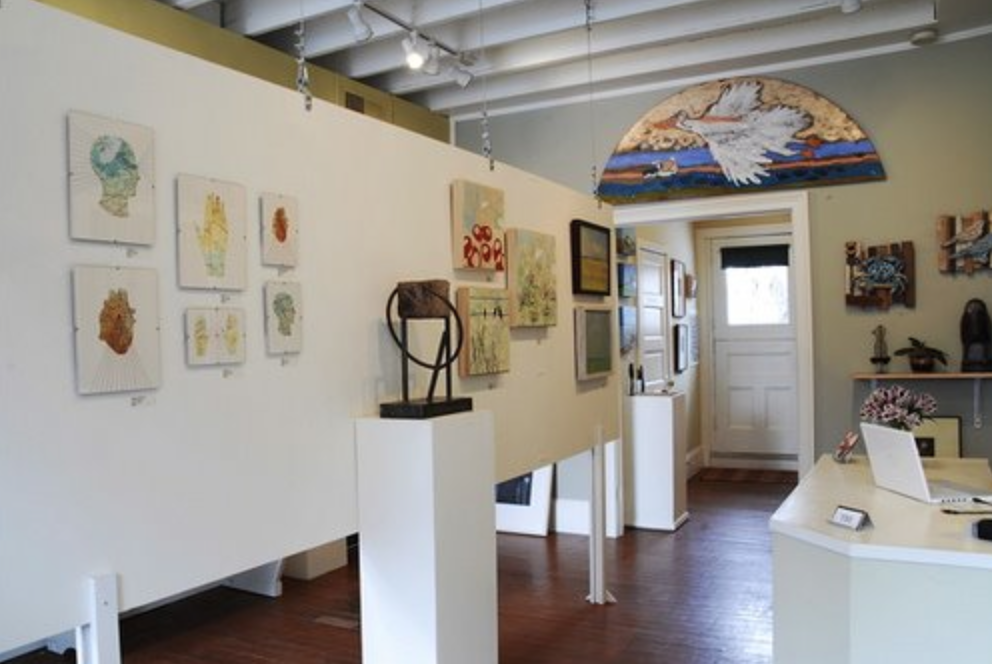
When I owned a gallery one of the most challenging aspects was physically hanging all the two-dimensional artwork. At any given moment there were upwards of twenty artists represented, and each one of them seemed to employ a different hanging mechanism on the back of their work. Many times these mechanisms weren't appropriate for the pieces, and that made my job quite a bit harder. Trust me when I say that having a gallery is not easy. There are very steep overhead costs, lots of humans who come through the door with only a tiny percentage who buy, big administrative tasks from inventorying to maintaining dozens of bios/resumes, managing and training sales staff, copious amounts of marketing and advertising, the physical labor of hanging shows, and much more.

I mention all that because when an artist makes a gallery owner's job harder, it doesn't usually bode well for the artist.

During the many years I worked in galleries I heard the owners say over and over, "I'd much rather work with an artist whose work is just good, but who has all their paperwork together, gets me stuff on time, and let's me do my job, than an incredible artist who's disorganized and a pain in the ass."

Whether you're repped by a gallery or not, someone is going to end up handling your artwork. Out of respect for them you want to make sure they can present the work easily and safely in a way that allows the work to shine.

So let's talk for a moment about the mundane - but necessary! - topic of hardware. 

eyelet.png

Eyelets and Wire The traditional method of hanging a two-dimensional framed work is two eyelet screws secured into the frame or stretchers on back about one-quarter of the way down from the top (as flush to the frame as possible) with picture hanging wire strung between. If you work on stretched canvas this is the way to go. (You can also use D-rings instead of eyelet screws.)

If your work is heavy, you want the wire to go through and around the eyelet twice so that the weight of the work won't cause it to slip. Wrap a significant extra length of wire tightly around itself to secure.

Also, don't make the wire so long that the work pitches off the wall too far, or shows above the frame top. You want just a little give to it, but not too much. Ideally the peak point of the wire, when taught, will be a few inches from the top of the frame for small to medium works, and a bit more for larger works. (More here if you need help.)

screen-shot-2014-01-07-at-12-39-59-pm.png


Sawtooth Hangers Sawtooth hangers are great for smaller works, especially if the works are done on box frames. When using a sawtooth hanger make sure it's centered, and make sure the jagged side is down. (Yes, I've gotten work sent to me with upside down sawtooth hangers.)

If the edge of your box frame is not wide enough the person hanging the work will probably have to use two level nails (one nail and the work will fall off the wall if bumped or a breeze blows by). I've seen some artists tape string or wire across the back of small pieces. It certainly makes the work easier to hang, but the beauty of a box frame is how it sits flush to the wall.

screen-shot-2014-01-07-at-12-46-34-pm.png


Keyhole Hangers Admittedly, this isn't my favorite hanging method. It's a pain in the butt to line up the nail with the hole, for one, and secondly the work can totter on the rounded edge of the hole. Some pieces have two holes and, well, that's even more of a pain trying to level two nails and line them up. That said, if you have no other option you can use this. I'd try for something else first though.

screen-shot-2014-01-07-at-12-47-30-pm.png


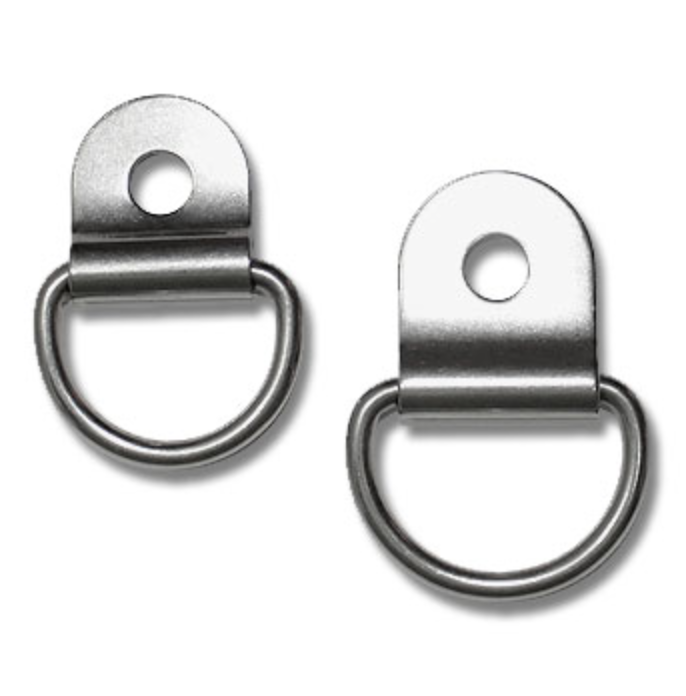
D-rings These work for medium and large works. Drill or screw the d-rings into back sides of your stretcher or frame so that the rounded part is pointing upwards, of course.

These can be a pain to hang as it requires measuring tape, a level and a good amount of finagling, but if your work is very heavy it's a great option. If it's not too heavy, consider stringing wire between the D-rings (as you would eyelet screws) for easier hanging. In that scenario the D-ring top is facing inward instead of upward.

screen-shot-2014-01-07-at-1-21-49-pm.png


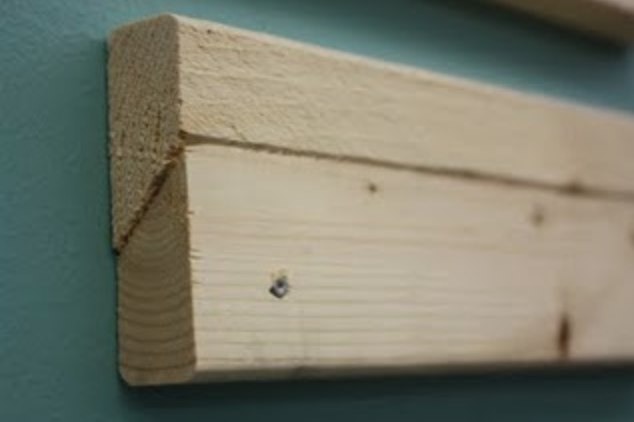
French Cleat The French Cleat is great for works done on, say, aluminum or wood - works that are, essentially, frameless. The idea is that the backside of your artwork has one beveled piece of wood secured to it. A companion piece of wood with the opposite bevel is then secured to the wall, so the beveled piece on back of the art fits right over it. This is not hard to hang, but can put significant holes in the walls, so make sure this is most appropriate method to your work before using.

screen-shot-2014-01-07-at-12-55-40-pm.png


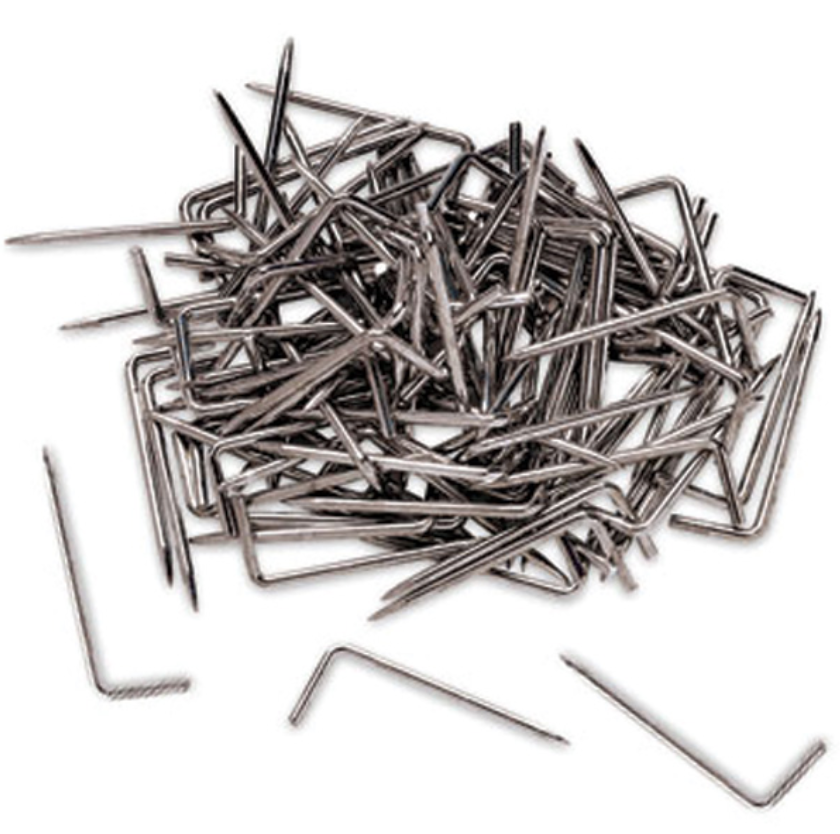
L Pins For lighter frameless works - piece done on light wood or on glass  that cannot be strung on the back - L pins may be the best way to hang.

In this scenario the long end of the nail is (gently) hammered into the wall, while the short end secures the work.

If you aren't hanging your own work, include four L Pins and instructions when you sell the work, or when sending to a gallery, so the buyer/gallery owner can hang it successfully.

screen-shot-2014-01-07-at-12-57-32-pm.png

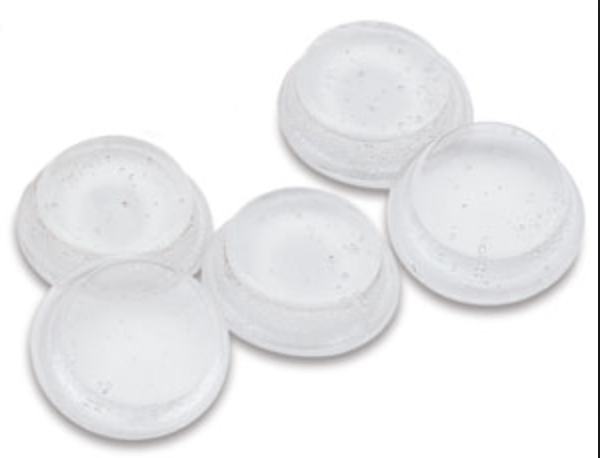
Bumpers Obviously bumpers aren't a hanging mechanism, but I figured I'd mention them since they can be important to the presentation of your art. If a piece is pitching forward off the wall at the top, add bumpers to the bottom corners. This will move the bottom of the work away from the wall enough so that the work looks more flush to the wall. Of course, if the work is pitching forward off the wall significantly, you may be using the wrong hanging mechanism. Try tightening the wire in back or using a different method.

screen-shot-2014-01-07-at-12-59-07-pm.png

No hardware? A lot of folks making small affordable works use ready made frames or cheap, easy-to-assemble metal frames. There's nothing wrong with that - except when it makes the artwork a pain to hang.

If that's the case with your presentation, do your best to cleanly jerry-rig the frames for easy hanging, or include suggestions for the buyer. And, by "suggestions" I don't mean something like, "Bang nail into wall. Wedge head of the nail between the frame edge and painting edge." That's not cool.

Some Etiquette * If you make odd shaped work, like draped linen or free floating paper cuts, for example, include hanging materials with your shipment or, at the very least, include recommendations and instructions.

* If a gallery or buyer requests different hanging method on future works than the one you're currently using and you have a good relationship with the them (meaning, they sell/buy your work) do what they say. Unless, of course, there's a very specific and thoughtful reason you wish not to. In that case, have a convo with the owner/buyer and explain why your method is best.

*In general, try to keep the back of your work as clean as possible. Avoid crazy or dangerous wire ends sticking out, a million pieces of tape, protruding eyelet screws and the like. Bring some care and attention to the process. If you can paper or felt the back - great. Whatever you can do to make it NOT look like a child or madwoman put this together is ideal.

Getting it ON the wall Finally, for those who want to know how to actually get the work on the wall and what to use, this article is fantastic and covers all the nitty gritty of hanging and securing your work.

In Fine Art, Illustration, Painting, Printmaking Tags hanging artwork, hanging mechanisms for artwork, how to hang art, making your art presentable, stringing a painting, the presentation of art, what to use on the back of my artwork, wiring a painting, wiring a piece of art

All Creativelike: An Interview with Printmaker Jenni Freidman

November 8, 2013 Leigh Medeiros
picture-11.png

Jenni Freidman is one of those artists I've always admired for her consistent dedication. I was super fortunate to be able to attend art school with Jenni in the - cough - 1990's at Hartford Art School in Connecticut, where she now teaches. (Lucky kids!) And, she was as steadfast and committed then as she is now. While her work has changed over the years, she never fails to bring poetry to the process. And, damn, if this gal doesn't know how to rock a party dress. (See Exhibit A above.)

Jenni, how would you define creativity? Wow! Isn’t that the question! Right now I would say being able to solve problems of all kinds in non-traditional ways. Thinking in an abstract way, finding your voice and having the courage to stand by it. I am sure I would have answered differently 10 years ago, and if you ask me in 10 years I will have another answer.

8004652143_012b9b9550_o.jpg

Tell me about your journey to becoming a printmaker. What is it about printmaking that called you to it? I had no idea what printmaking really was when I went to school. I took a class with Jim Lee as a freshman and just decided that what ever he was teaching the next year, that’s what I would take! It turned out to be an introduction to etching course and I fell instantly in love. There is something really wonderful about taking particular steps to reach a goal that is very satisfying to me. It sounds so cliché, but the process was really exciting! There is a magic in the making that I don’t find with anything else. There is part that you can control and part where you have to let go. That balance is really good for me in making my work, and in my life.

When do you feel at your creative peak, or most inspired? Inspiration comes in lots of different ways and in different sizes. My daughter Nona is a huge inspiration, she acts with CRAZY confidence in almost everything she does and it has given me more courage to take risks in my work. Also, I work best always with LONG stretches of time, where I can really immerse myself in what I am doing. Those times are sacred and special, I don’t find them very often. My creative juices flow more like fits and spurts now.

I find, however, that work creates work, so the more time I can spend making, the more time seems to open up, and more ideas start coming.

I am at a really exciting point in my work now. I am just at the beginning of something new. I feel tentative a bit, but mostly excited to see what happens.

8378329922_bf1aed2e6e_o.jpg

For a long time nature played a big role in your work. Can you talk about that? I love natural forms and phenomena. I feel guilty a lot, because I act more as an observer than an active participant. I am not a camping girl, and I am terrified of bugs. But I love to look and to learn. I have always been able to find a metaphor or a kind of explanation for what I am feeling in my life in the forms of the natural world. It has helped me make sense of things both in times of darkness and in light.

Your recent has been more colorful and, perhaps, more about pattern. You've also started integrating other materials into your prints. Can you tell me about that shift, and what you're uncovering with the mixed media process? Yes! I mentioned before what an inspiration my daughter is for me, and in lots of ways. I would have NEVER described myself as girly before she was born. It seems though, that she changed me. Maybe it was all the adorable clothes and toys, maybe it is that she was ALL princess when she was very young, but it could be just becoming a mother, but I am all pink and sparkle now.

I took up baking, scoured stores for adorable aprons and started looking at things I would have never thought to look at, much less be inspired by before. I would go into candy stores, just to look. I started obsessing over fabric designers, color, texture and pattern. It got to the point where I found that what I was inspired by had nothing to do with the work I was making. I decided I had to make a radical shift and teach myself how to find PLAY and JOY in the work and in my life.

It is the first time in my life I went after something like that. The melancholy in the work was inherent in me, it was easy after a while, which is part of the reason I needed to stop. It wasn’t where I wanted to be anymore.

img_4782.jpg

The manipulating of the prints really came from spending time with you in Rhode Island. I had been fascinated with cut paper and embroidery for a while, but felt like I wouldn’t let myself do it. You gave me permission, and the rest is history! THANK YOU!!!* It is just starting and I have a long way to go, but I love the object”ness” that the sewing and cutting create. It allows me to layer in a very physical way. (*Interviewers Note: She's giving me WAY too much credit here. She's nice like that.)

You are also a professor at University of Hartford's Hartford Art School. How does teaching inform your art making, and vice versa? I love my job, and it’s like a dream come true to be able to teach at the Hartford Art School. The students challenge me all the time to learn new things, both technically and conceptually so I can be a good resource for them. They open my mind and help me to examine and re-examine what art is all about. I don’t think I would ask those questions on my own and I LOVE being part of the community. It’s like a second family.

I mostly try to keep my art making separate from my teaching. I want students to find their own way. I, of course, have my biases, as we all do, but I try to keep them in check so I can help them explore their own subject matter.

8462768187_19e802e266_b.jpg

You recently had a solo show in NYC - Congrats! What was the like for you? So many artists hold that experience as a pinnacle of career. Was it everything it's cracked up to be? It was and wasn’t. The best metaphor I can make is to my wedding. We planned for a year, had all the details attended to, and made sure everything would go off without a hitch. It was expensive and over in an instant. What I learned about the wedding was that it was a blip in the span of our relationship. That what happens before and after that one day is far more important. It is important to do it, because it’s a marker, but it is only a moment in a big line of moments.

If you are worth your salt, you make love and art last for more than just a moment.

movingspirals.jpg

What are your influences or favorite artists? My favorite artists change all the time, depending on what I am trying to deal with in my work. Right now I am hugely inspired and humbled byLeslie Dill. She speaks in poetry and her work is weightless and heavy all at once. I cry every time I hear her speak, it goes straight to my bones. I love Agnes Martin and Vija Celmins. There are countless friends whose work I have in my home that light me up on a daily basis. I drink and eat from pieces made from artists' hands and sit now typing surrounded by work of my students and friends. Feeling pretty blessed, actually.

Any advice to aspiring printmakers? Do it because you love it. Make the best most honest work you can. Don't be too hard on yourself. Take lots of risks. Share your work with others.

picture-12.png

Jenni Freidman makes prints and drawings, as well as limited edition books. Her work has been shown in exhibitions across the United States and abroad. She teaches at the Hartford Art School at the University of Hartford, and lives in West Hartford with her husband Brian, daughter Nona, and their dog Vinnie. More info about her and her work can be found on her website HERE.

In Interviews, Printmaking Tags artist interview, artmaking, creative process, creative process for printmakers, embroidery, etching, etching process, Jim Lee, making prints, mixed media process, paper cuts, printmaker interview, printmaking, printmaking process, process of creation